 #### 如果你的电脑上未安装 git, 请参考 [GitHub 文档](https://docs.github.com/cn/get-started/quickstart/set-up-git) 进行安装。
## Fork(复制)本代码仓库
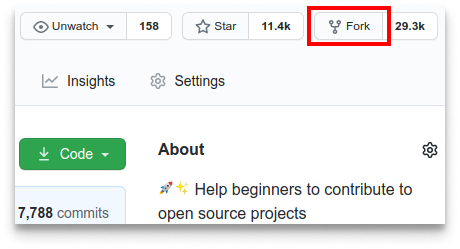
点击图示中的按钮去 Fork 这个代码仓库。
这个操作会将代码仓库复制到你的账户名下。
## Clone(克隆)代码仓库
#### 如果你的电脑上未安装 git, 请参考 [GitHub 文档](https://docs.github.com/cn/get-started/quickstart/set-up-git) 进行安装。
## Fork(复制)本代码仓库
点击图示中的按钮去 Fork 这个代码仓库。
这个操作会将代码仓库复制到你的账户名下。
## Clone(克隆)代码仓库
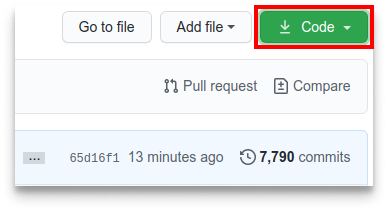 接下来将复制的代码仓库克隆到你的电脑上。点击图示中的绿色按钮,接着点击复制到剪切板按钮(将代码仓库地址复制下来)
随后打开命令行窗口,敲入如下 git 命令:
```
git clone "刚才复制的 url 链接"
```
"刚才复制的 url 链接"(去掉双引号)就是复制到你账户名下的代码仓库地址。获取该链接的方法详见上一步。
接下来将复制的代码仓库克隆到你的电脑上。点击图示中的绿色按钮,接着点击复制到剪切板按钮(将代码仓库地址复制下来)
随后打开命令行窗口,敲入如下 git 命令:
```
git clone "刚才复制的 url 链接"
```
"刚才复制的 url 链接"(去掉双引号)就是复制到你账户名下的代码仓库地址。获取该链接的方法详见上一步。
 譬如:
```bash
git clone git@github.com:
譬如:
```bash
git clone git@github.com: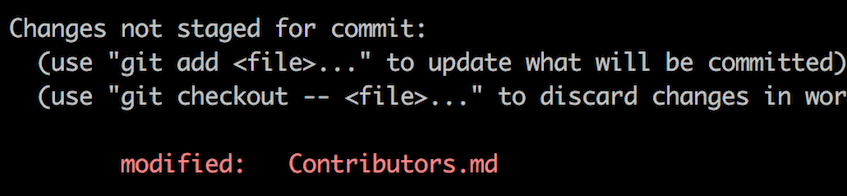 ```bash
git add Contributors.md
```
现在就可以使用 `git commit` 命令 commit 你的修改了。
```bash
git commit -m "Add <你的名字> to Contributors list"
```
将 `<你的名字>` 替换成你的名字
## 将改动 Push(推送)到 GitHub
使用 `git push` 命令推送代码
```bash
git push origin <分支的名称>
```
将 `<分支的名称>` 替换为之前新建的分支名称。
```bash
git add Contributors.md
```
现在就可以使用 `git commit` 命令 commit 你的修改了。
```bash
git commit -m "Add <你的名字> to Contributors list"
```
将 `<你的名字>` 替换成你的名字
## 将改动 Push(推送)到 GitHub
使用 `git push` 命令推送代码
```bash
git push origin <分支的名称>
```
将 `<分支的名称>` 替换为之前新建的分支名称。
如果在 push(发布)过程中出 error(错误),点击这里
- ### Authentication Errorremote: Support for password authentication was removed on August 13, 2021. Please use a personal access token instead. remote: Please see https://github.blog/2020-12-15-token-authentication-requirements-for-git-operations/ for more information. fatal: Authentication failed for 'https://github.com/去 [GitHub's tutorial](https://docs.github.com/en/authentication/connecting-to-github-with-ssh/adding-a-new-ssh-key-to-your-github-account) 学习如何生成新的 SSH 密匙以及配置。/first-contributions.git/'
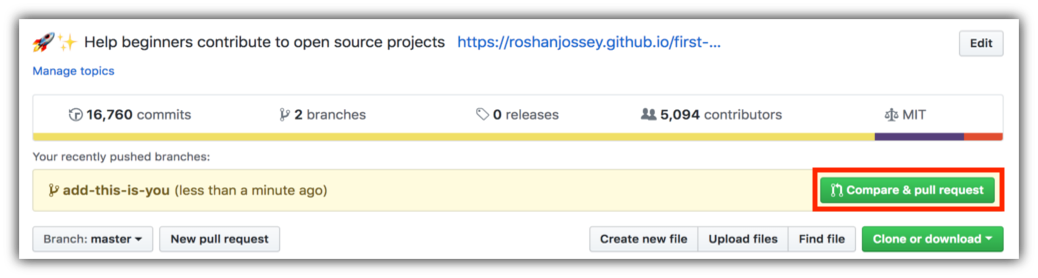 接着再点击 `Create pull request` 按钮,正式提交 pull request。
 不久之后,我便会把你所有的变化合并到这个项目的主分支。更改合并后,你会收到一封电子邮件通知。
### [ 更多资料 ](../additional-material/git_workflow_scenarios/additional-material.md)
## 接下来该做什么呢?
祝贺!你刚刚完成了作为贡献者经常会使用到的标准流程:_fork -> clone -> edit -> pull request_ !
为你的第一次贡献庆祝吧,不要忘记和你的朋友以及你的小迷弟小迷妹们分享我们的[网站](https://roshanjossey.github.io/first-contributions/#social-share)哟!
如果您想更多练习,请查看 [code contributions](https://github.com/roshanjossey/code-contributions)。
接下来,让我们带你开始参与到其他项目中来。我们整理了一份包含一些简单入门问题的项目清单,方便你快速上手。请查看这个[项目清单](https://firstcontributions.github.io/#project-list)。
### [附加材料](additional-material/git_workflow_scenarios/additional-material.md)
## 使用其他工具的教程
|
不久之后,我便会把你所有的变化合并到这个项目的主分支。更改合并后,你会收到一封电子邮件通知。
### [ 更多资料 ](../additional-material/git_workflow_scenarios/additional-material.md)
## 接下来该做什么呢?
祝贺!你刚刚完成了作为贡献者经常会使用到的标准流程:_fork -> clone -> edit -> pull request_ !
为你的第一次贡献庆祝吧,不要忘记和你的朋友以及你的小迷弟小迷妹们分享我们的[网站](https://roshanjossey.github.io/first-contributions/#social-share)哟!
如果您想更多练习,请查看 [code contributions](https://github.com/roshanjossey/code-contributions)。
接下来,让我们带你开始参与到其他项目中来。我们整理了一份包含一些简单入门问题的项目清单,方便你快速上手。请查看这个[项目清单](https://firstcontributions.github.io/#project-list)。
### [附加材料](additional-material/git_workflow_scenarios/additional-material.md)
## 使用其他工具的教程
| 项目支持者:
![]()