[](https://github.com/ellerbrock/open-source-badges/)
[ ](https://join.slack.com/t/firstcontributors/shared_invite/enQtNjkxNzQwNzA2MTMwLTVhMWJjNjg2ODRlNWZhNjIzYjgwNDIyZWYwZjhjYTQ4OTBjMWM0MmFhZDUxNzBiYzczMGNiYzcxNjkzZDZlMDM)
[](https://opensource.org/licenses/MIT)
[](https://www.codetriage.com/roshanjossey/first-contributions)
# પ્રથમ ફાળો
|
](https://join.slack.com/t/firstcontributors/shared_invite/enQtNjkxNzQwNzA2MTMwLTVhMWJjNjg2ODRlNWZhNjIzYjgwNDIyZWYwZjhjYTQ4OTBjMWM0MmFhZDUxNzBiYzczMGNiYzcxNjkzZDZlMDM)
[](https://opensource.org/licenses/MIT)
[](https://www.codetriage.com/roshanjossey/first-contributions)
# પ્રથમ ફાળો
|  | GitHub કમાન્ડ લાઇન ઈન્ટરફેસ (CLI) |
| ------------------------------------------------------------------------------------------------------------------------------- | ----------------------------------- |
આ અમારાં માટે માર્ગદર્શિકા છે, ટર્મિનલના શોખીનો માટે, જે બધું જ ટર્મિનલમાં કરવા ઈચ્છે છે, અને [GitHub-CLI](https://cli.github.com/) ની મદદથી, અમે આ હાંસલ કરી શકીએ છીએ! તમારું પ્રથમ યોગદાન મજાનું, સન્માનજનક અને પ્રેરણાદાયક હોવું જોઈએ.
આ માર્ગદર્શિકા થોડી વધુ પડકારજનક છે કારણ કે અમે કોઈપણ ગ્રાફિકલ ઈન્ટરફેસનો ઉપયોગ કરી રહ્યા નથી, પણ આ હજી પણ મજેદાર છે અને તમે ચોક્કસપણે તેને અનુસરવામાં સક્ષમ છો!
## જરૂરીતા
- Git ઇન્સ્ટોલ કરેલું હોવું જોઈએ ([Git કેવી રીતે ઇન્સ્ટોલ કરવું](https://git-scm.com/downloads))
- GitHub ખાતું હોવું જોઈએ
હવે અમારે આપણા સિસ્ટમમાં `github-cli` ટૂલ ઇન્સ્ટોલ કરવું પડશે. આ માટે [અધિકૃત દસ્તાવેજો](https://github.com/cli/cli#installation) અનુસરો.
તેના પછી, CLI માં લોગિન કરવા માટે નીચેનો આદેશ આપો:
```bash
gh auth login
```
સૂચનાઓ અનુસરો અને તમે તૈયાર છો!
# આ રીપોઝિટરી ફોર્ક કરો
આ માત્ર એક આદેશ ચલાવવાથી શક્ય છે:
```bash
gh repo fork firstcontributions/first-contributions
```
**મહત્વપૂર્ણ: તે તમને પૂછશે કે શું તમે તેને ક્લોન કરવું માંગો છો, "હા" પસંદ કરો.**
# તમારી શાખા બનાવો
આ પગલું અમે Git ની મદદથી કરીશું, માટે આ આદેશ ચલાવો (તમારું નામ બદલો, ઉદાહરણ તરીકે):
```bash
git switch -c add-john-doe
```
# જરૂરી ફેરફારો કરો અને તેમને કમિટ કરો
હવે `Contributors.md` ફાઇલને કોઈપણ ટેક્સ્ટ એડિટરમાં ખોલીને તમારું નામ ઉમેરો. પછી ફાઇલ સાચવો.
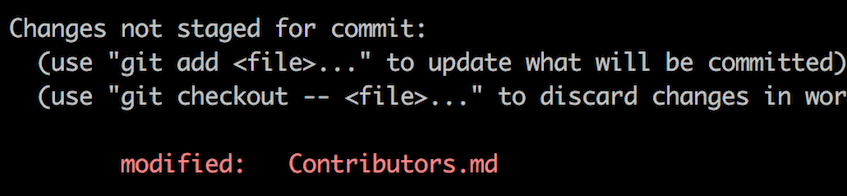
પ્રોજેક્ટ ડિરેક્ટરીમાં `git status` ચલાવો અને ફેરફારો જુઓ.
| GitHub કમાન્ડ લાઇન ઈન્ટરફેસ (CLI) |
| ------------------------------------------------------------------------------------------------------------------------------- | ----------------------------------- |
આ અમારાં માટે માર્ગદર્શિકા છે, ટર્મિનલના શોખીનો માટે, જે બધું જ ટર્મિનલમાં કરવા ઈચ્છે છે, અને [GitHub-CLI](https://cli.github.com/) ની મદદથી, અમે આ હાંસલ કરી શકીએ છીએ! તમારું પ્રથમ યોગદાન મજાનું, સન્માનજનક અને પ્રેરણાદાયક હોવું જોઈએ.
આ માર્ગદર્શિકા થોડી વધુ પડકારજનક છે કારણ કે અમે કોઈપણ ગ્રાફિકલ ઈન્ટરફેસનો ઉપયોગ કરી રહ્યા નથી, પણ આ હજી પણ મજેદાર છે અને તમે ચોક્કસપણે તેને અનુસરવામાં સક્ષમ છો!
## જરૂરીતા
- Git ઇન્સ્ટોલ કરેલું હોવું જોઈએ ([Git કેવી રીતે ઇન્સ્ટોલ કરવું](https://git-scm.com/downloads))
- GitHub ખાતું હોવું જોઈએ
હવે અમારે આપણા સિસ્ટમમાં `github-cli` ટૂલ ઇન્સ્ટોલ કરવું પડશે. આ માટે [અધિકૃત દસ્તાવેજો](https://github.com/cli/cli#installation) અનુસરો.
તેના પછી, CLI માં લોગિન કરવા માટે નીચેનો આદેશ આપો:
```bash
gh auth login
```
સૂચનાઓ અનુસરો અને તમે તૈયાર છો!
# આ રીપોઝિટરી ફોર્ક કરો
આ માત્ર એક આદેશ ચલાવવાથી શક્ય છે:
```bash
gh repo fork firstcontributions/first-contributions
```
**મહત્વપૂર્ણ: તે તમને પૂછશે કે શું તમે તેને ક્લોન કરવું માંગો છો, "હા" પસંદ કરો.**
# તમારી શાખા બનાવો
આ પગલું અમે Git ની મદદથી કરીશું, માટે આ આદેશ ચલાવો (તમારું નામ બદલો, ઉદાહરણ તરીકે):
```bash
git switch -c add-john-doe
```
# જરૂરી ફેરફારો કરો અને તેમને કમિટ કરો
હવે `Contributors.md` ફાઇલને કોઈપણ ટેક્સ્ટ એડિટરમાં ખોલીને તમારું નામ ઉમેરો. પછી ફાઇલ સાચવો.
પ્રોજેક્ટ ડિરેક્ટરીમાં `git status` ચલાવો અને ફેરફારો જુઓ.
 આ ફેરફારોને નીચેના આદેશથી ઉમેરી દો:
```bash
git add Contributors.md
```
હવે તમારાં ફેરફારોને કમિટ કરો:
```bash
git commit -m "Add your-name to Contributors list"
```
`your-name` ને તમારા નામથી બદલો.
# ફેરફારો GitHub પર અપલોડ કરો
```bash
git push origin -u your-branch-name
```
`your-branch-name` ને તમે અગાઉ બનાવેલી શાખાના નામથી બદલો.
આ ફેરફારોને નીચેના આદેશથી ઉમેરી દો:
```bash
git add Contributors.md
```
હવે તમારાં ફેરફારોને કમિટ કરો:
```bash
git commit -m "Add your-name to Contributors list"
```
`your-name` ને તમારા નામથી બદલો.
# ફેરફારો GitHub પર અપલોડ કરો
```bash
git push origin -u your-branch-name
```
`your-branch-name` ને તમે અગાઉ બનાવેલી શાખાના નામથી બદલો.
જો પુશ કરતી વખતે ભૂલ આવે તો અહીં ક્લિક કરો:
- ### ઓથન્ટિકેશન ભૂલ
remote: Support for password authentication was removed on August 13, 2021. Please use a personal access token instead.
  remote: Please see https://github.blog/2020-12-15-token-authentication-requirements-for-git-operations/ for more information.
  fatal: Authentication failed for 'https://github.com//first-contributions.git/'
તમારા GitHub એકાઉન્ટમાં SSH કી કેવી રીતે ઉમેરવી તે જાણવા માટે [GitHub ની ટ્યુટોરિયલ](https://docs.github.com/en/authentication/connecting-to-github-with-ssh/adding-a-new-ssh-key-to-your-github-account) જુઓ.
# તમારા ફેરફારોની સમીક્ષા માટે રજુ કરો
હવે નીચેનો આદેશ આપવાથી પુલ રિકવેસ્ટ બનાવી શકશો:
```bash
gh pr create --repo firstcontributions/first-contributions
```
પછી પુલ રિકવેસ્ટ સબમિટ કરો.
તમે `gh status` આદેશ વડે તમારી પુલ રિકવેસ્ટ ચકાસી શકો છો.
## હવે પછી શું?
અભિનંદન! તમે ફોર્ક -> ક્લોન -> એડિટ -> પુલ રિકવેસ્ટ ના સ્ટાન્ડર્ડ વર્કફ્લો પૂરું કર્યું છે.
તમારા યોગદાનની ઉજવણી કરો અને મિત્રો સાથે શેર કરો [વેબ એપ](https://firstcontributions.github.io/#social-share) પર જઈને.
જો તમને કોઈ પ્રશ્ન હોય અથવા મદદ જોઈતી હોય, તો તમે અમારી Slack ટીમમાં જોડાઈ શકો છો. [Slack ટીમમાં જોડાઓ](https://join.slack.com/t/firstcontributors/shared_invite/zt-vchl8cde-S0KstI_jyCcGEEj7rSTQiA).
હવે તમને અન્ય પ્રોજેક્ટ્સમાં યોગદાન આપવાનું શરુ કરવું જોઈએ! અમે સરળ ઈશ્યૂઝ ધરાવતા પ્રોજેક્ટ્સની યાદી બનાવેલ છે, જેને તમે શરૂ કરી શકો. [પ્રોજેક્ટ્સની યાદી જુઓ](https://firstcontributions.github.io/#project-list).
### [વધુ સામગ્રી](additional-material/git_workflow_scenarios/additional-material.md)
## અન્ય સાધનો સાથે ટ્યુટોરિયલ્સ
[મુખ્ય પૃષ્ઠ પર પાછા જાઓ](https://github.com/firstcontributions/first-contributions#tutorials-using-other-tools)